

How To Install A Light Junction Box
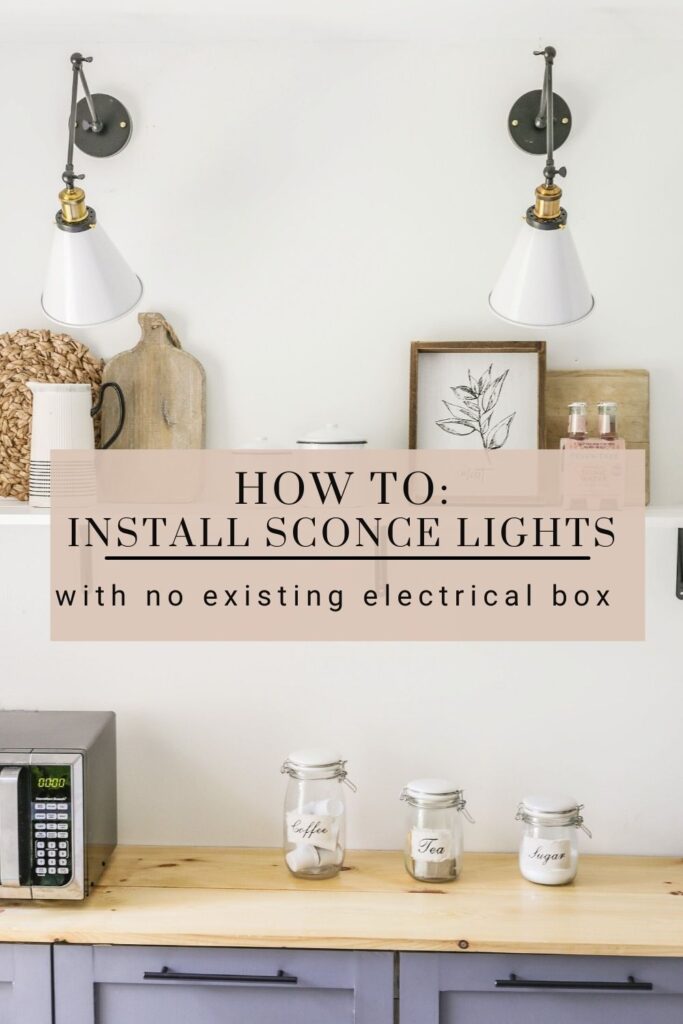
Longing for the custom look of hardwired wall sconces, but don't take the extra dough to beat out on an electrician? If yous aren't easily intimidated, you may be able to save some money past doing it yourself. In this beginner's tutorial, permit me show y'all how my husband, a complete novice, installed junction boxes for our wall lights.
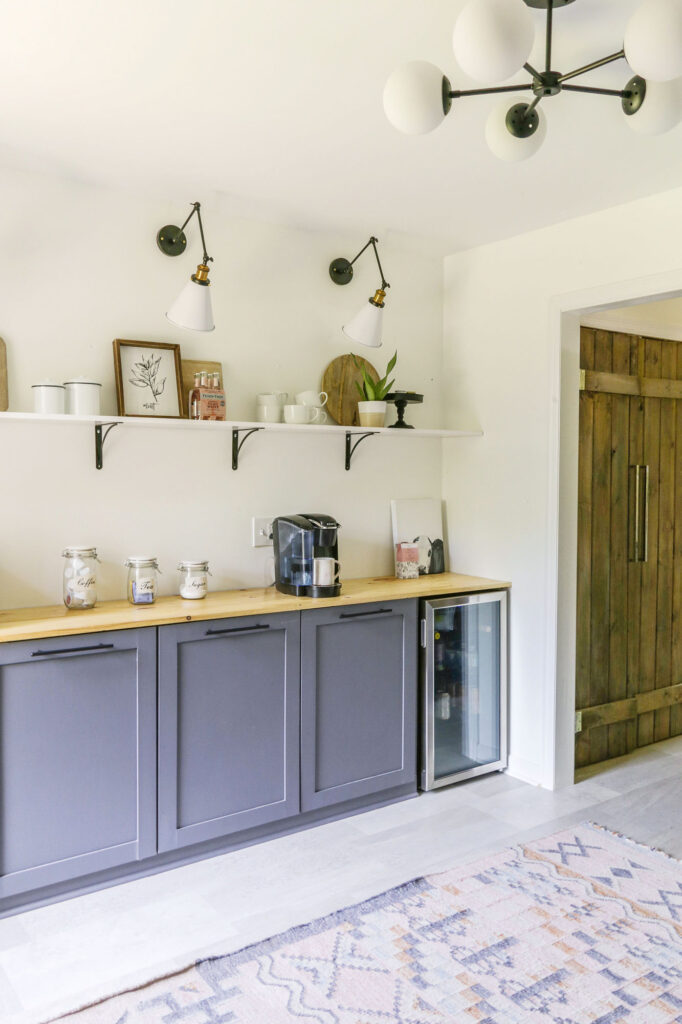
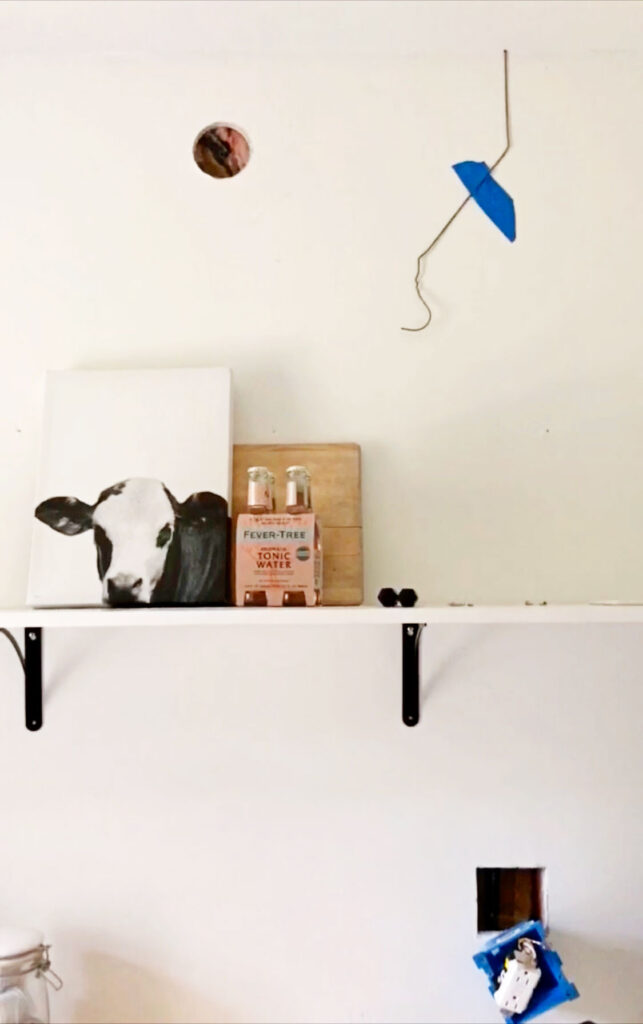
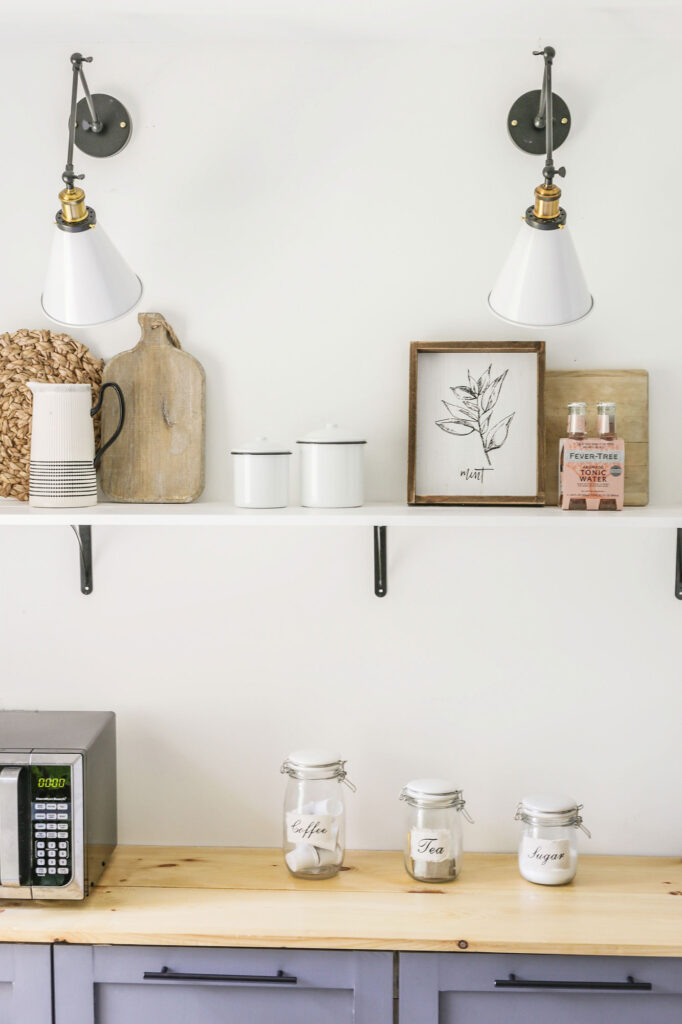
In the midst of our DIY custom butler pantry project a while back, I decided that I absolutely had to have hard-wired wall sconces over our DIY open shelving. All the same, at that place was ane small problem….
There was no receptacle on the wall to hardwire the desired light fixtures into.
While I would never ever attempt any sort of electrical project myself (I take a major case of adult A.D.D.), my husband, who has no formal electric preparation, made this endeavor sound like no big deal. And then…I gladly let him effigy it out on his own.
Much to our please, the project was a success and I got the custom expect I was going for- tricking ya'll into thinking I am some sort of rich b*tch.
With that said, please have all precautions and do any necessary research earlier attempting any project. Also bank check your local rules and regulations, permits needed, item product instructions and always ask for communication when unsure. Everyone's projection and location is dissimilar.
**DesigningVibes.com and Jon and Erica Van Slyke cannot be held responsible for any injuries, loss, your personal safety or the effect of your home comeback projects.**
Although I have touted this every bit a beginner's guide to electrical, this project is a little more than involved than most of the other projects I have shared on this weblog .
In terms of electric skill, it is more "beginner" in the sense that it does not require you to lay a finger on the fuse console. All we did was simply tie in to an existing outlet source.
At any rate, being that we are Not professionals( simply weekend DIY-ers), in the steps bellow, my married man breaks downwards this project in a manner that is hopefully more digestible (not to mention approachable) for the boilerplate Joe or Jane.
So here is how my husband installed an electrical box for our hardwired lights…
Materials Needed to Install a Junction Box for Wall Sconces:
-
Jab saw or oscillating saw to cut hole in wall for lightswitch box.
-
Adaptable pigsty saw cutter to cut hole in wall for sconce electrical boxes.
-
Electric wire (14 gauge for 15 amp circuit and 12 gauge for xx amp excursion)
-
Fish tape
-
Wire strippers
- Phillips and Flathead screw drivers
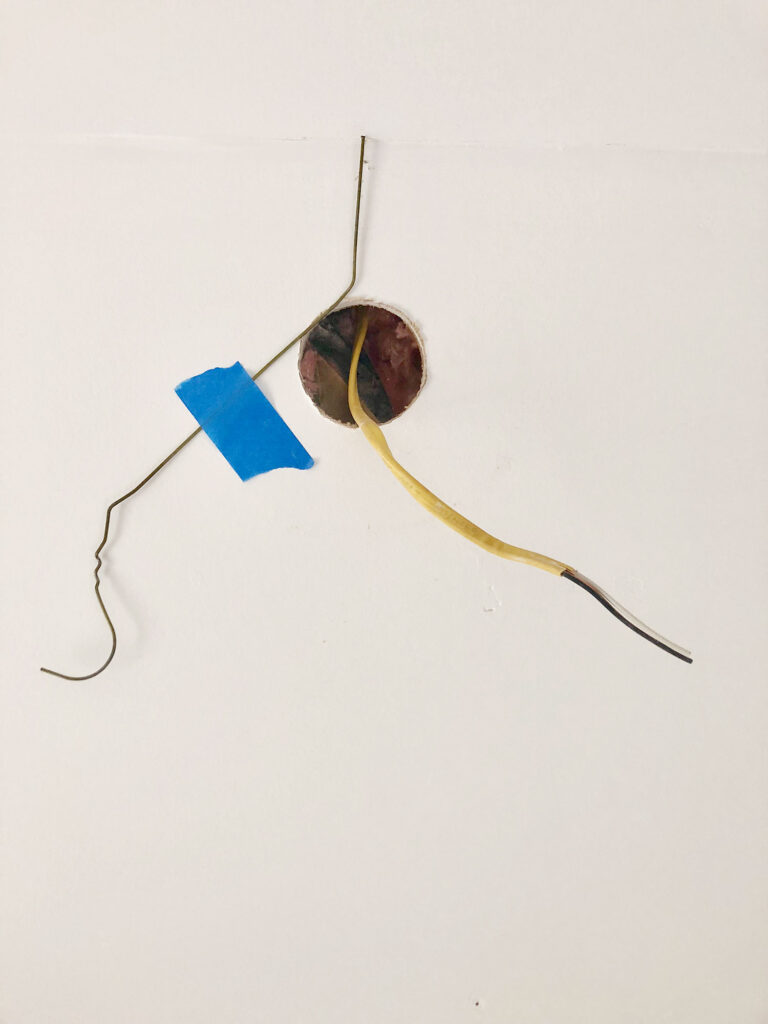
Notation: To avert having to demolish whatever sheetrock, you will need admission either to an attic or crawlspace.
How To Install a Lighting Receptacle:
1.Mark locations on wall where you will be installing the low-cal fixtures.
ii. Use a stud finder to make certain there are no studs within the mounting specs for the "old piece of work" electrical box.
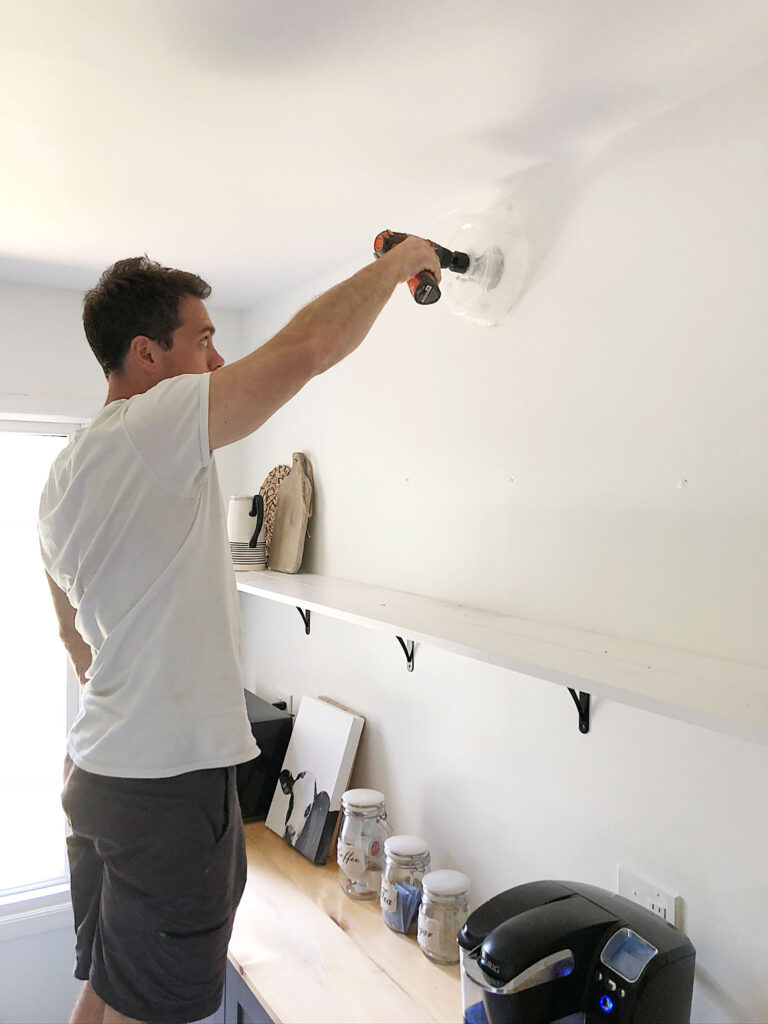
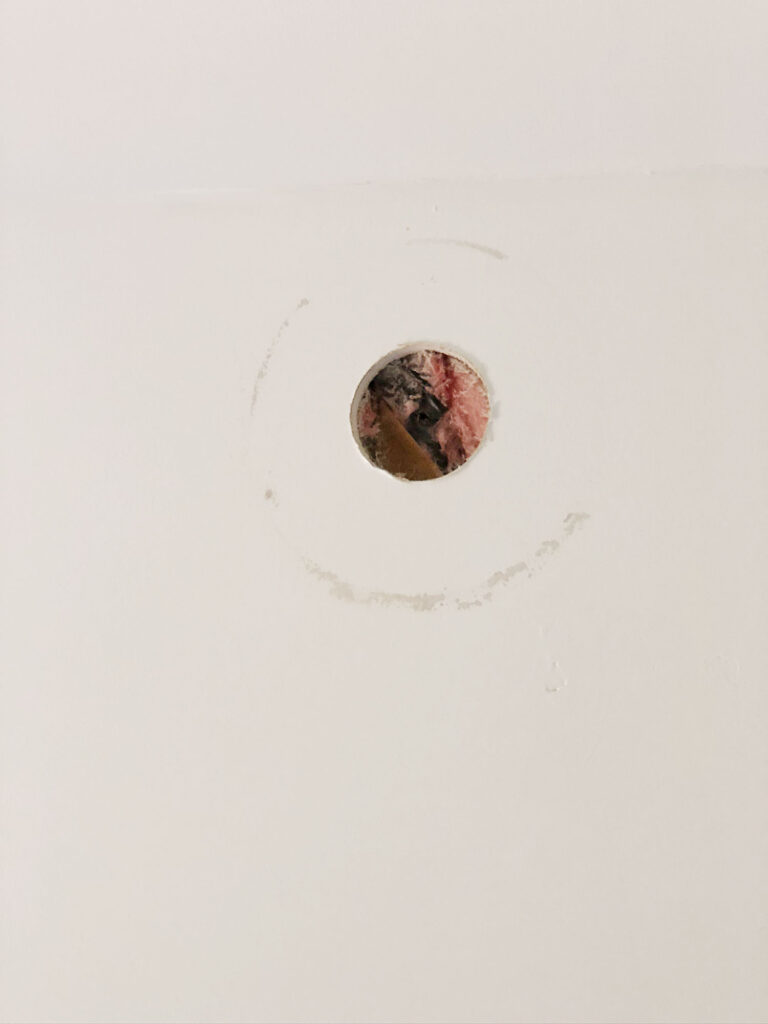
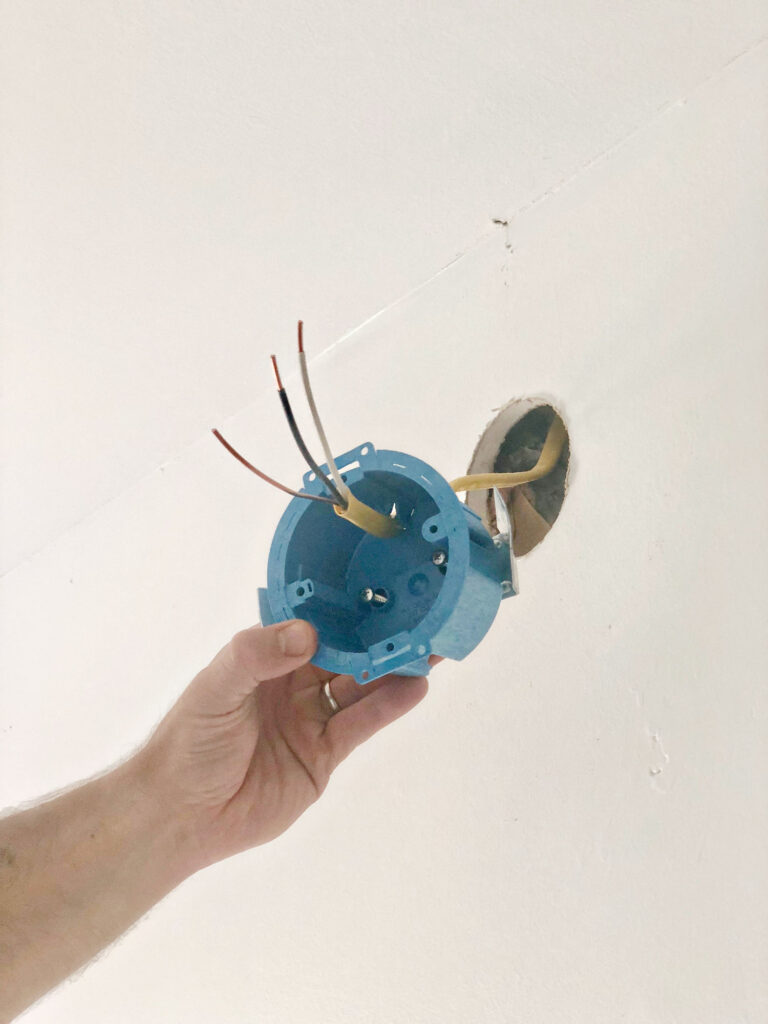
3. Using an adjustable hole saw cutter, cut hole in dry out wall co-ordinate to the electrical box specs.
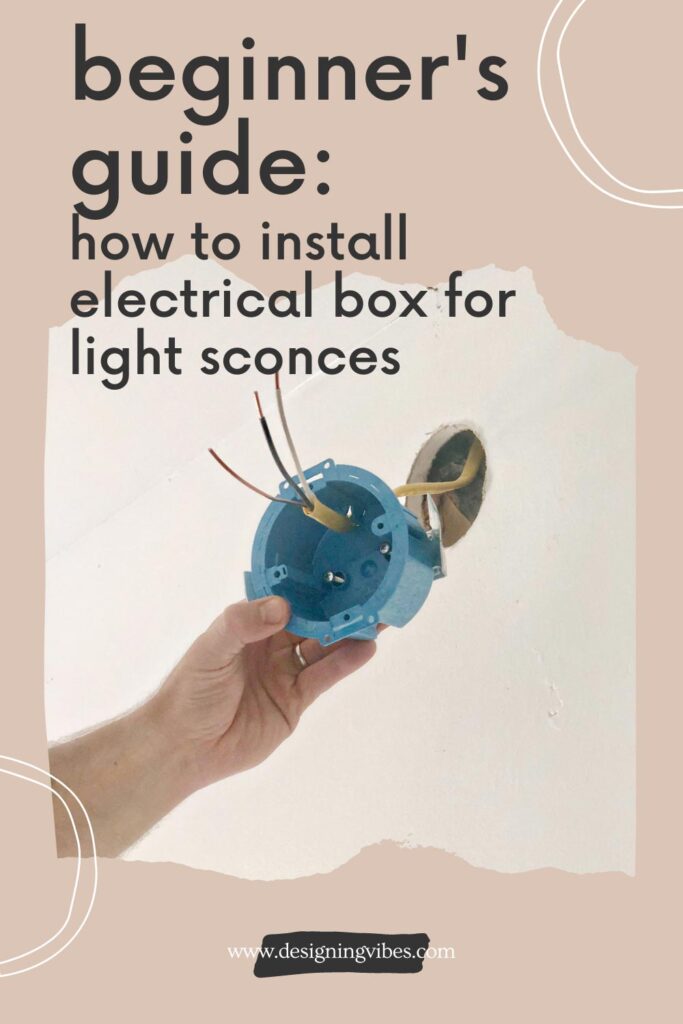
4. Install electric boxes in the holes. The box will have iii tabs that volition rotate out and tighten confronting the backside of the drywall every bit you tighten the screws. The lip on the front of the box and the tabs work together to "pinch" the dry wall and that is how the box is secured. Do non over tighten the screws every bit this will break the tabs.
5. Effigy out if you volition be running a new circuit from the breaker box (advanced electrical piece of work) or adding onto an existing circuit. If only adding wall sconces, it would be easiest to add onto an existing circuit because new engineering science bulbs have minimal watt draw and therefore would not stress an existing circuit.
six. If adding onto an existing circuit, locate the outlet nearest to the area you volition be installing the light switch for the wall sconces.
7. Important! Locate the breaker that controls that circuit and plough it off.
eight. Unscrew the outlet plate and then unscrew outlet from the box. You will demand to add wire to the available connections of the outlet. Near probable in that location volition be two open slot on the behind of the outlet that allow wire to be pushed in to make the connection. 1 slot will be aligned next to the brass colored spiral and the other with the silver screw. The black or "hot" wire always connects to the brass terminal and white connects to the silver terminal.
9 Stripe wire one/ii" back in push into proper slots-black to brass and white to silver.
10. If switch location will non exist directly above the outlet, you lot will need to determine if the attic or basement will be easier to access since the wire will cannot be fished beyond studs in the wall. You will have to take the wire through the bottom or top plate of the wall to connect information technology from the outlet to the switch.
11. Since nosotros went through the attic, I used a metal glaze hanger to button through the drywall ceiling to marker where I would need to drill through the top plate. The holes are pocket-sized and easily repaired with a minor amount of lightweight spackle.
12. Marker and install lightswitch box in the same manner you did the electrical boxes for the sconces.
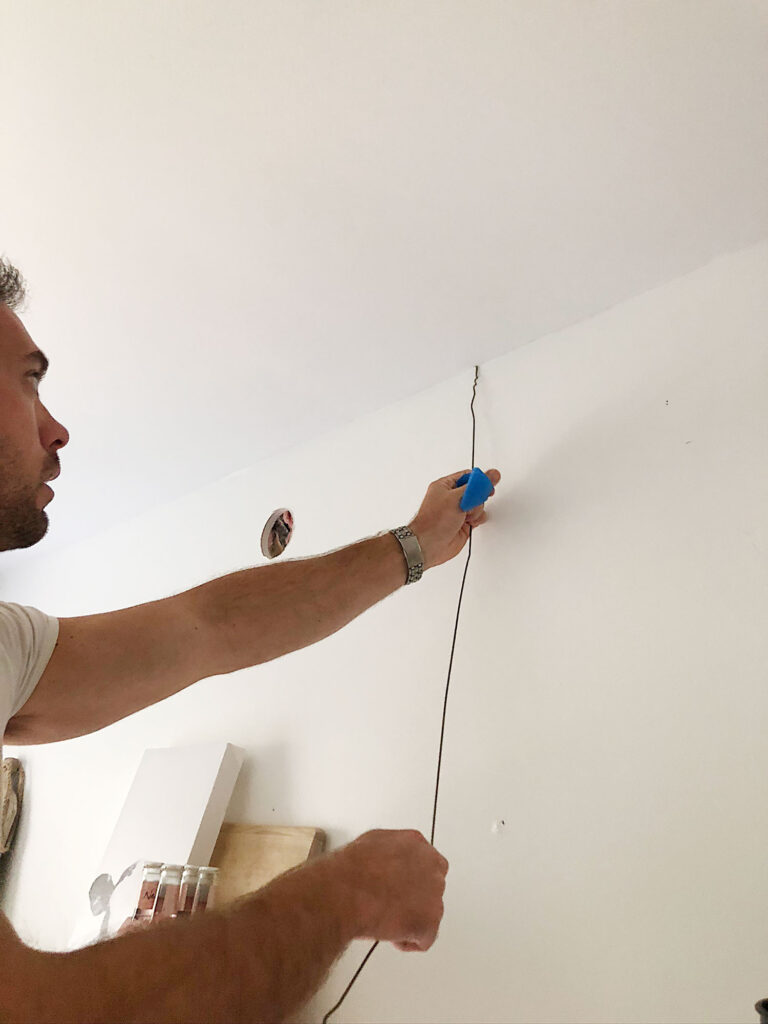
13. Fish wire from the outlet from the outlet to the attic or basement if not locating the switch directly above the outlet.
14. Drill hole in necessary location and so the wire can be located in the desired location of the wall.
fifteen. Fish wire to switch electric box.
xvi. Now fish new section of wire from switch box to get-go sconce electrical box.
17. Run section of wire from one electrical box to the others.
18. Wire switch by attaching the ii black wires to the brass screws. Discover at that place is no silver screws on the switch so attached two white wires together with a wire nut.
19. Wire in new sconces by attaching black to black and white to white wires.
twenty. Install bulbs before attaching sconces to electrical box and plough circuit on to make sure lights are working. If all is working properly, turn circuit dorsum off and mount up the switch and sconces to boxes.
A Note for Less- experienced DIY-ers:
As you have now probably gathered from the numerous steps included in this tutorial, this is a pretty lengthy process . Nonetheless, it is totally doable!
For any of yous needing encouragement, my hubby offered some words of wisdom…
"You can't exist intimidated! If you meet a route block, accept a step back and consult with trusty ol' Google. There was a time when I never would have fifty-fifty contemplated attempting electrical work, and now I experience completely comfortable with a project of this scope. No 1 starts off equally an expert, but y'all practise get more confident every bit you go."
I hope this tutorial was helpful for those of you exploring your options as information technology relates to installing electrical receptacles.
Now get out there and design some good vibes forth with a fabulous life!
PS. It would make the biggest difference if you could share this post with a friend or on social media. Thank y'all and so much for your support!


Source: https://designingvibes.com/how-to-install-an-electrical-box-for-a-wall-sconce-light/
Posted by: gunterthersemeaten.blogspot.com
0 Response to "How To Install A Light Junction Box"
Post a Comment